1. Create a new fence
To create a new fence: Tap “New fence” under Fences in the menu, and place the square roughly where you want the fence to be.

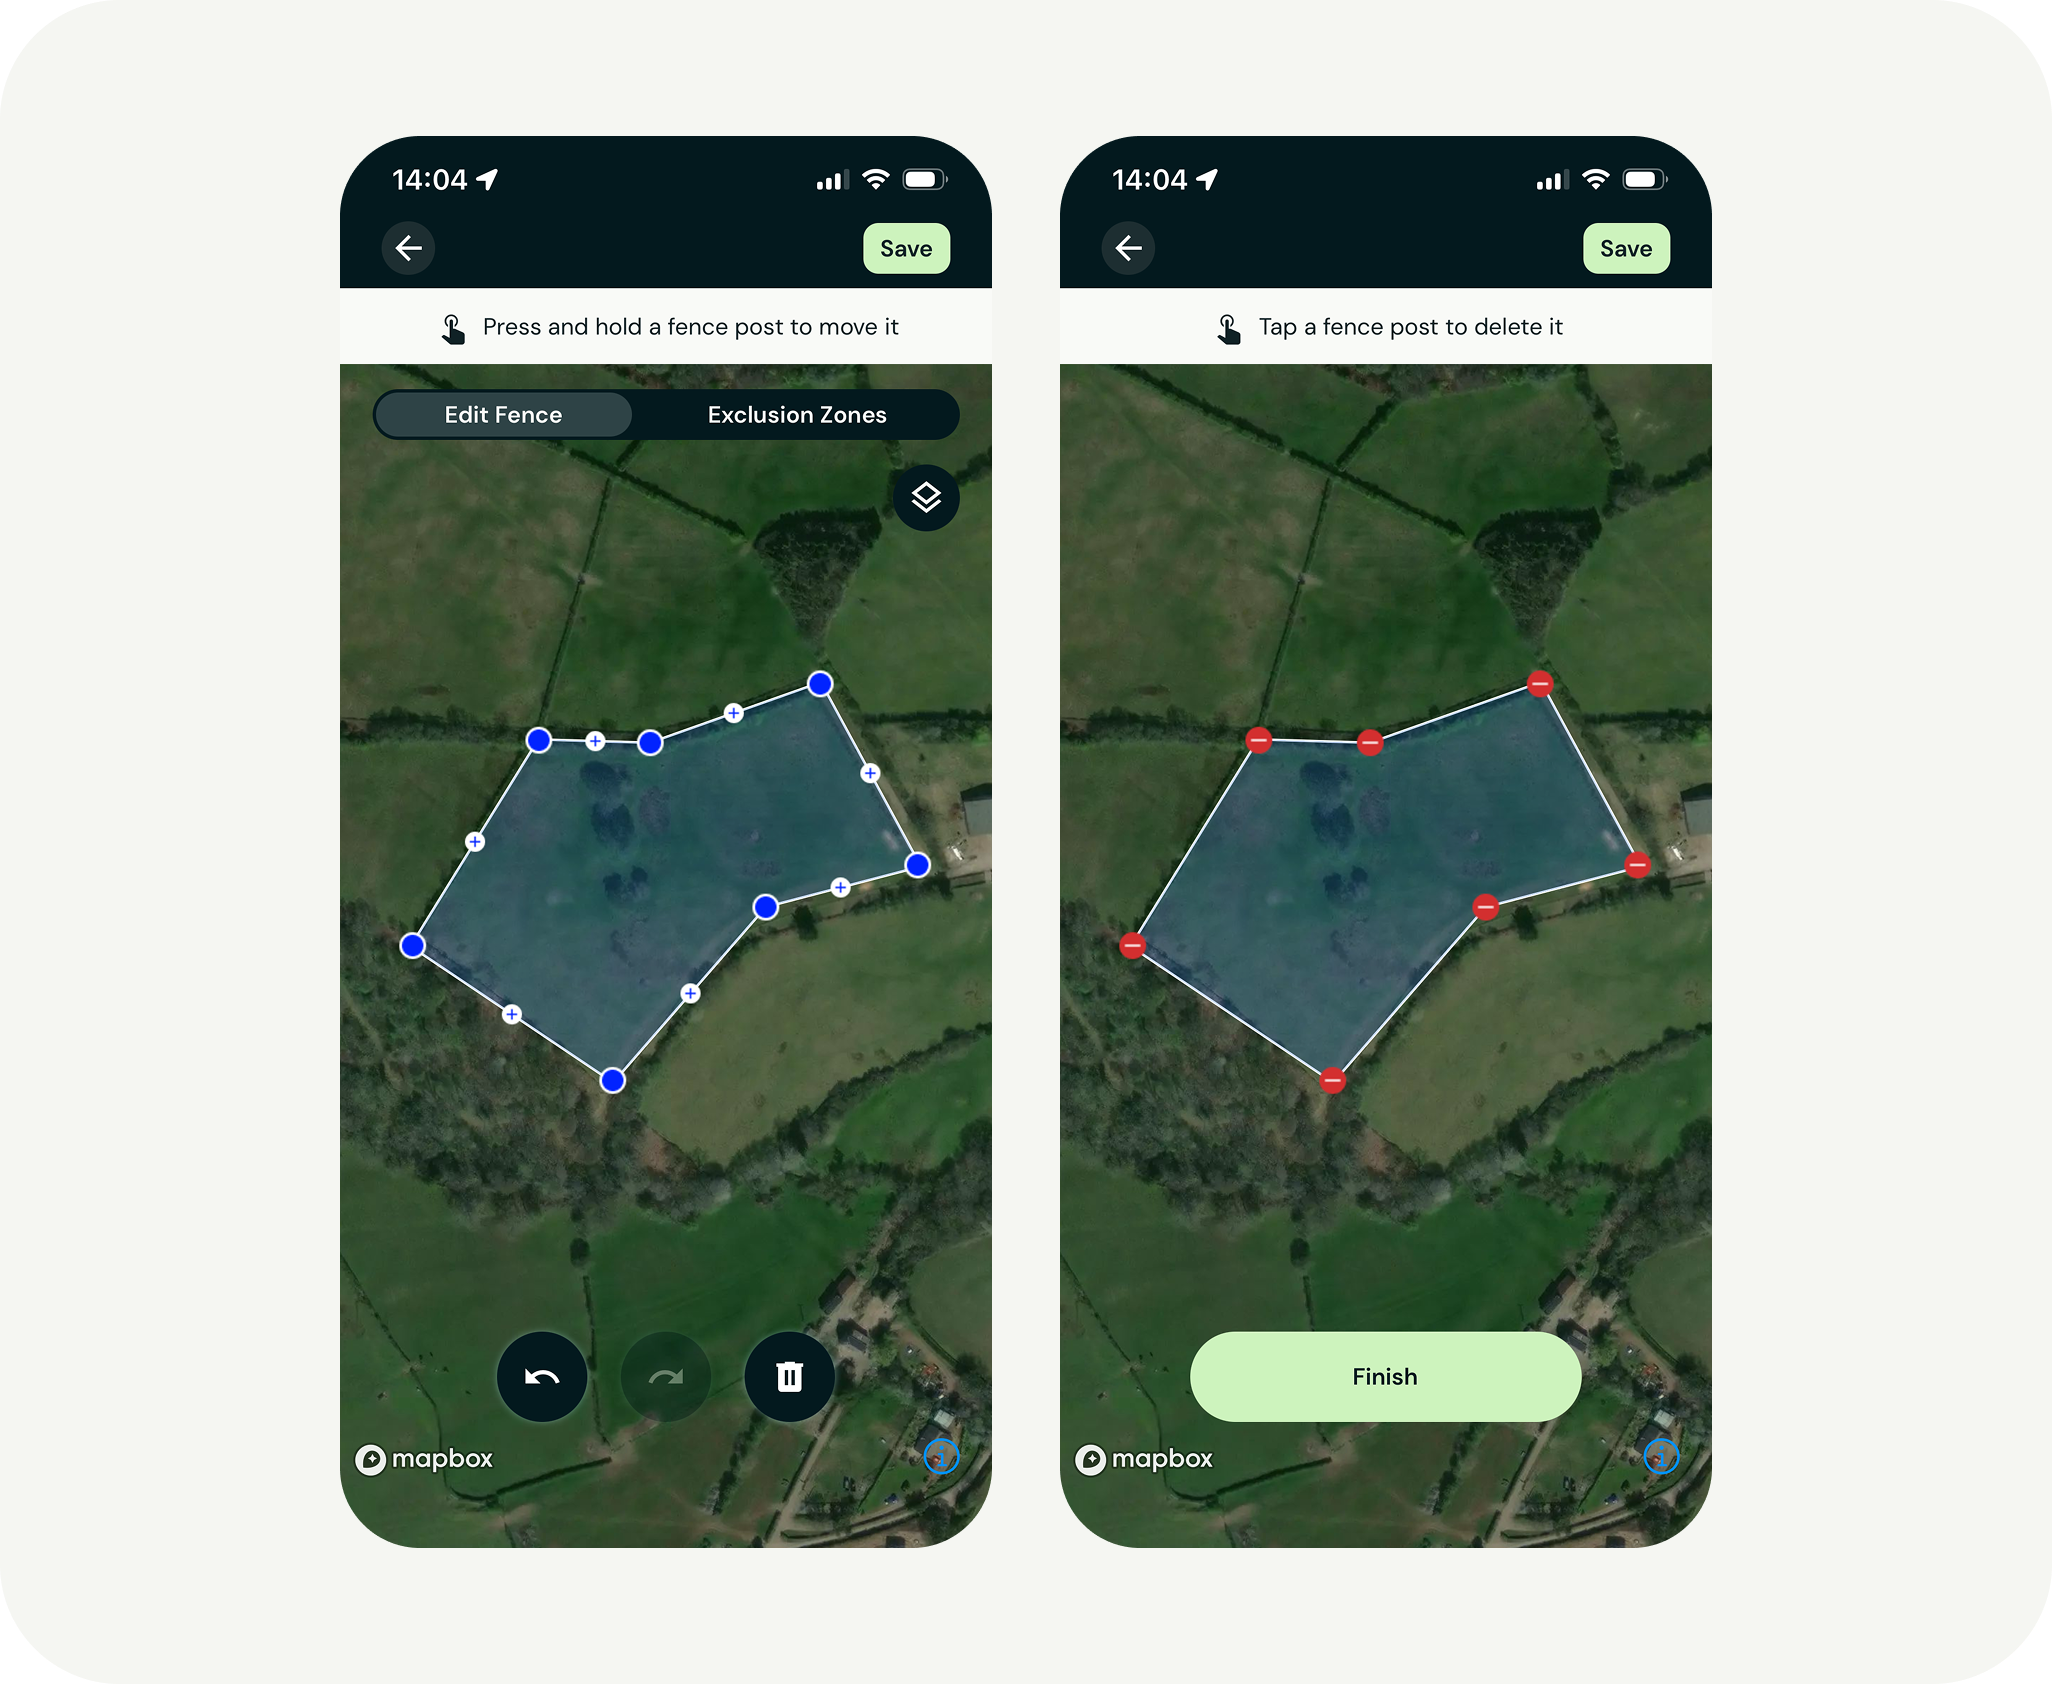
2. Draw the fence in the app
- Press and hold a fence post (blue circle) to move it.
- Add more posts by pressing and dragging the white icon with the plus sign.
- To delete fence posts, tap the trash bin icon in the bottom right corner and then select the posts you want to delete. Tap “Done” when you’re finished deleting.
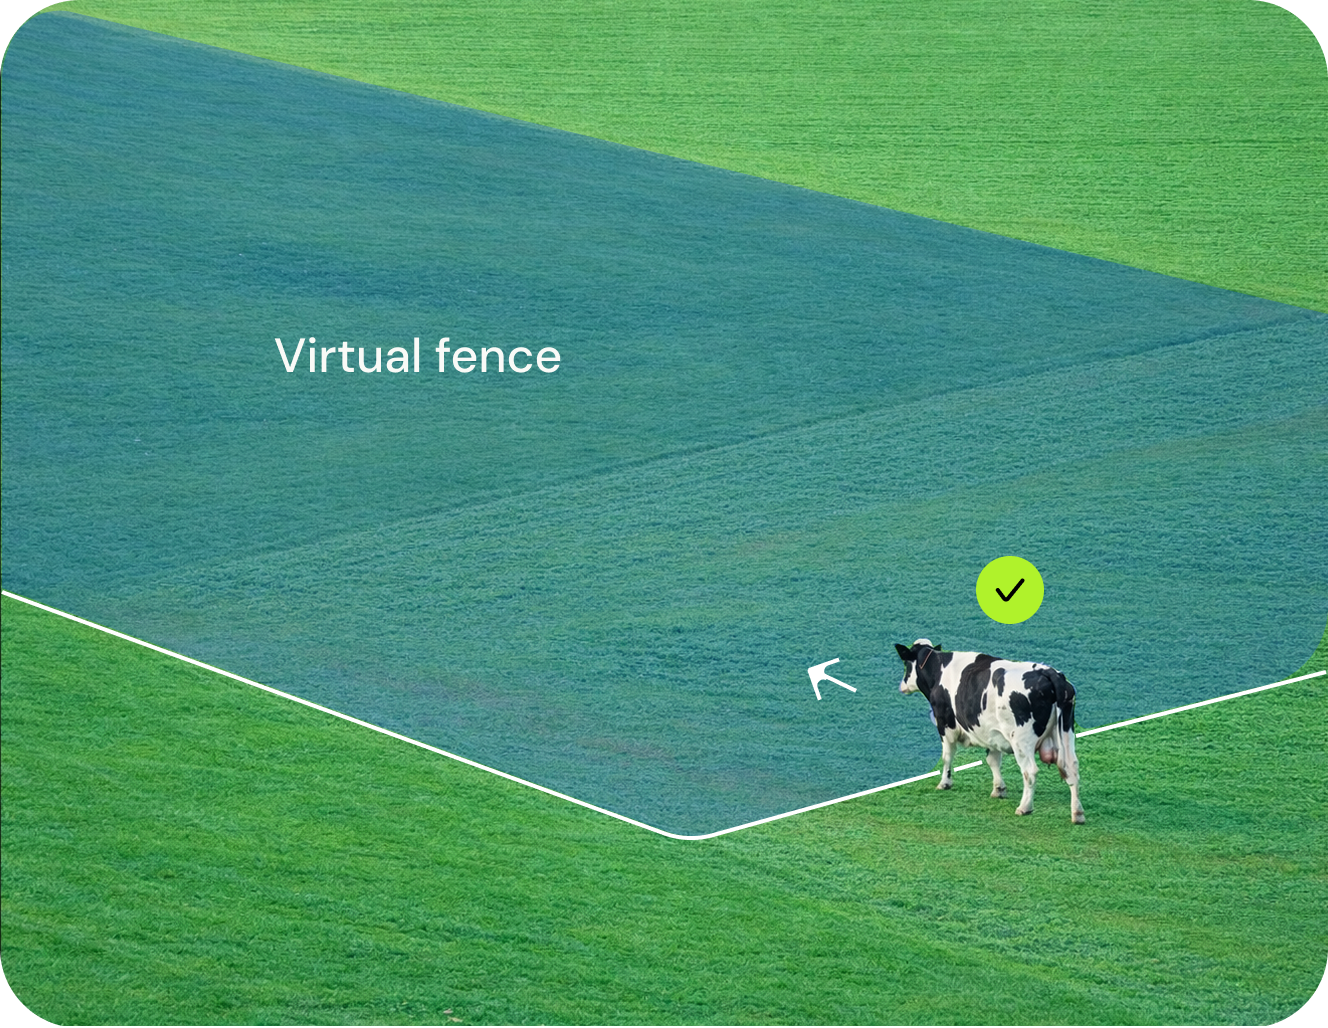
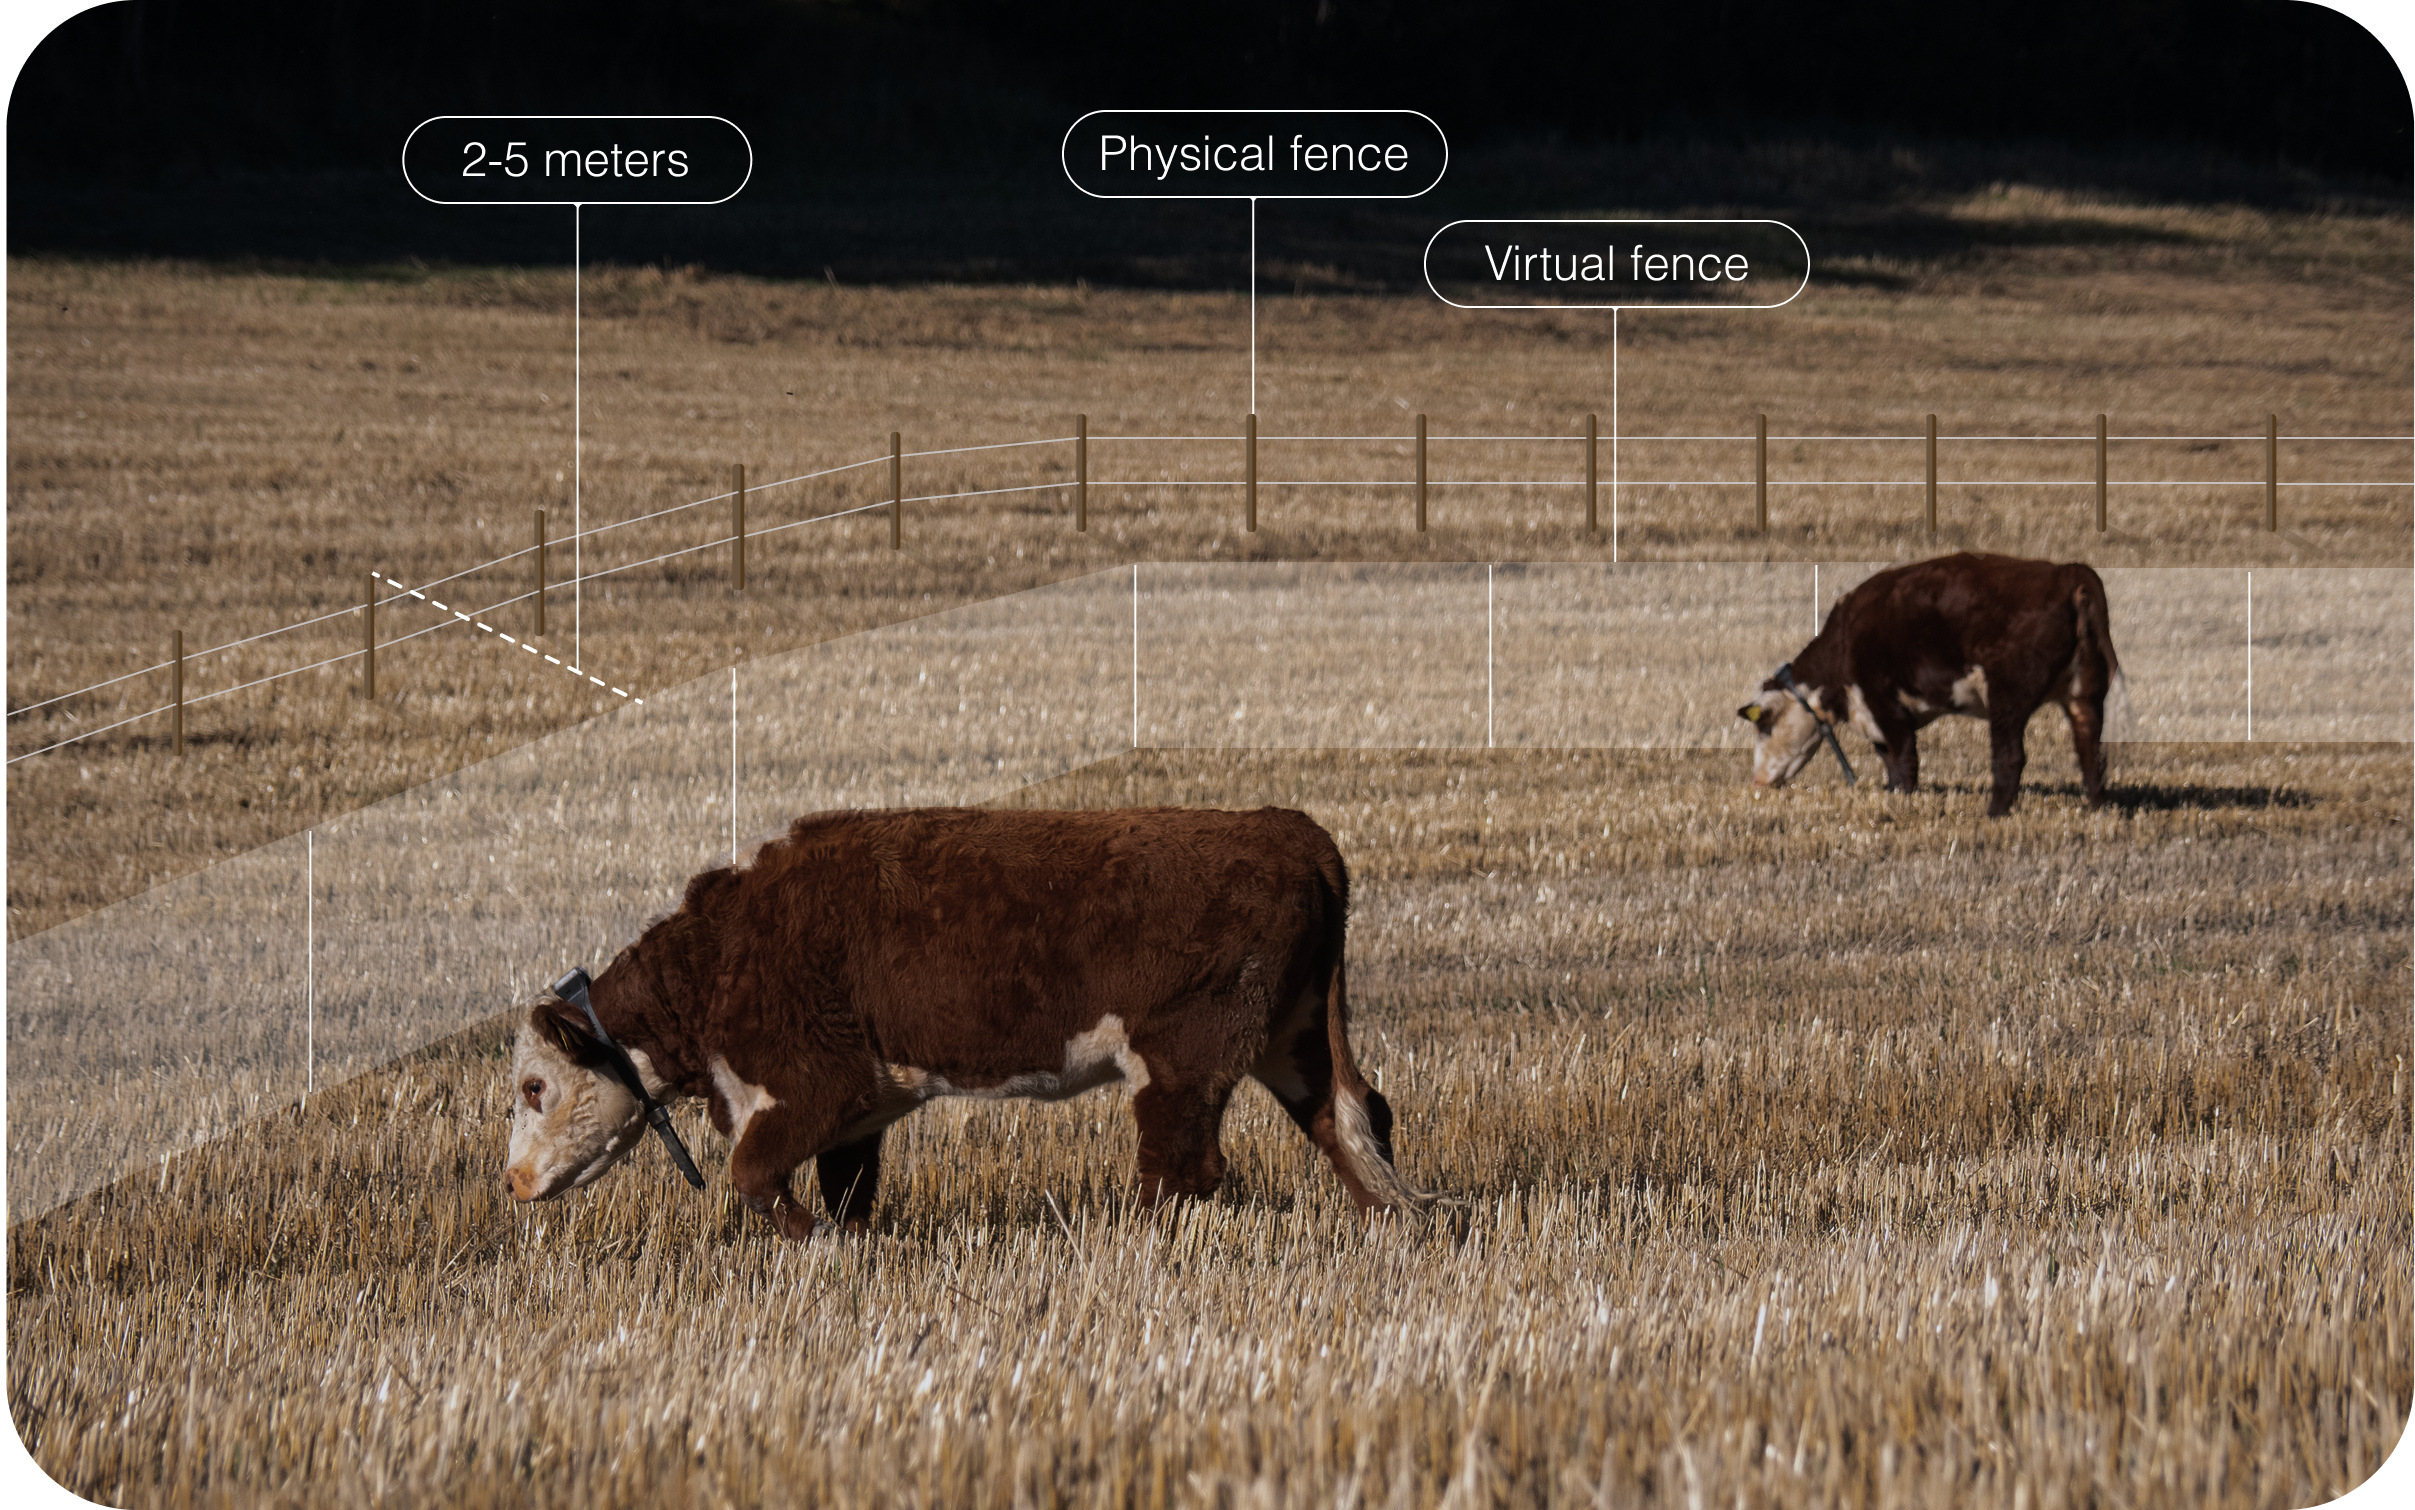
If this is a training fence, we recommend drawing the virtual fence 2-5 meters inside the physical fence.

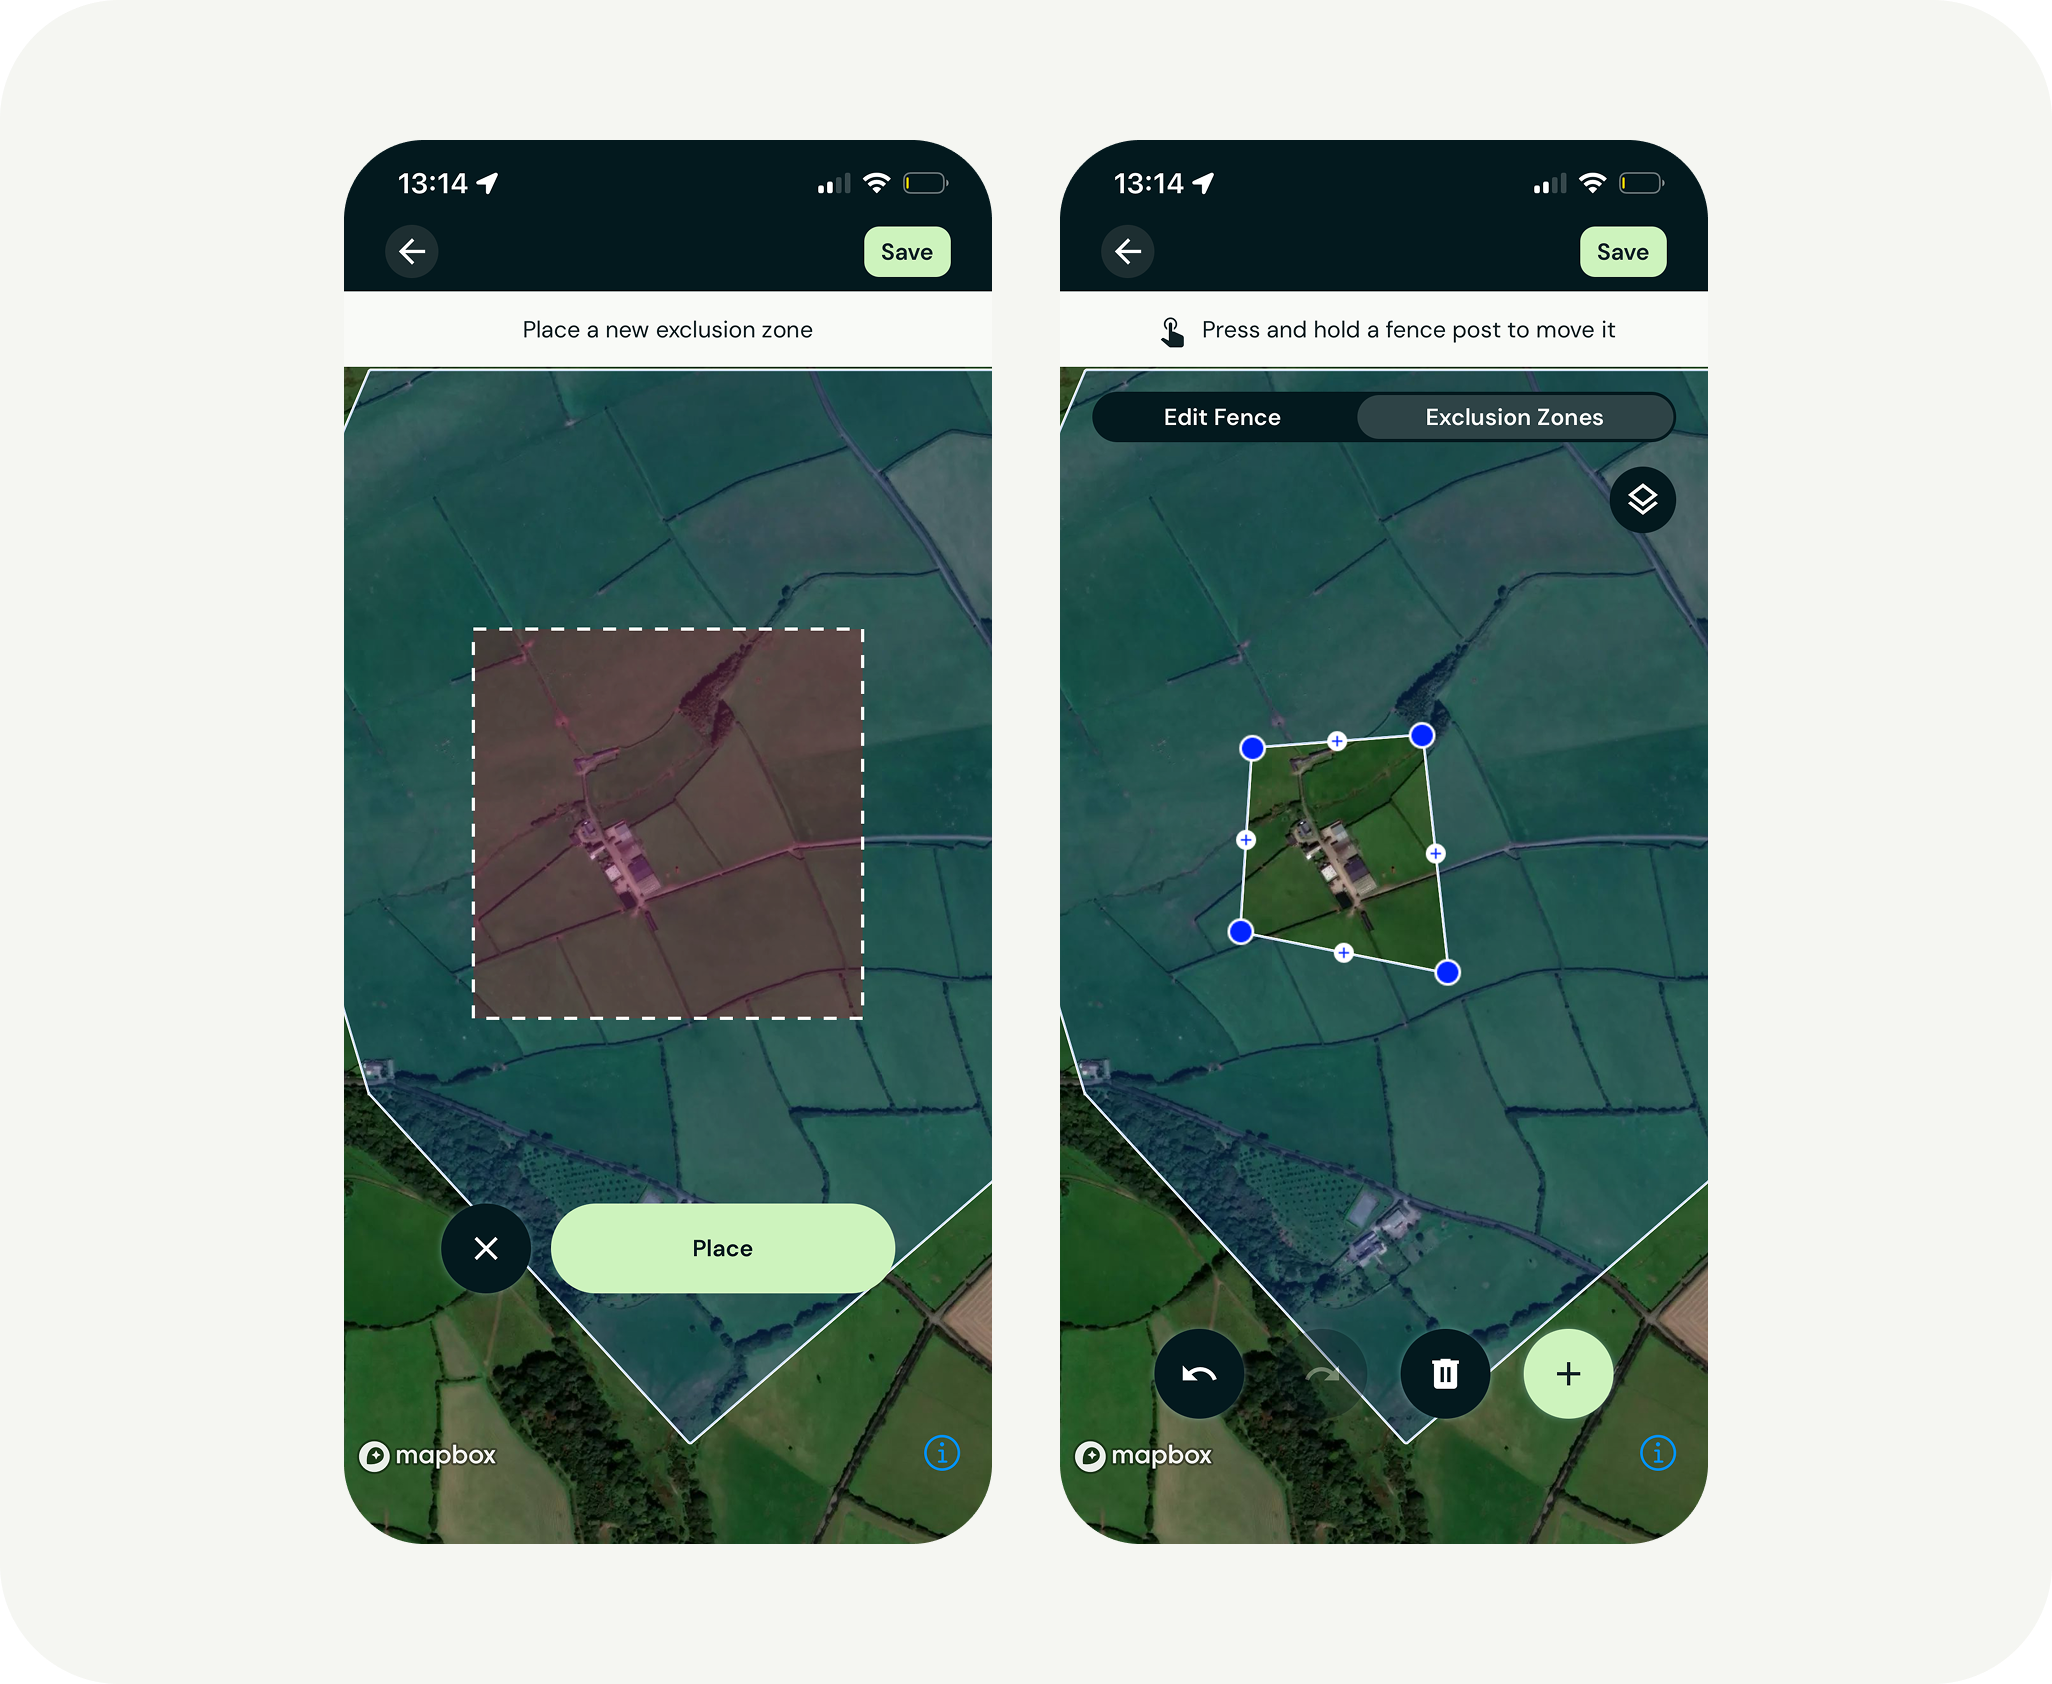
3. Creating exclusion zones
Exclusion zones are areas within your fence where you do not want your animals to go. Examples include:
- Residential areas
- Dangerous terrain (cliffs, swamps)
- Protected areas or high-traffic zones
If an area poses a risk to people or animals, we always recommend securing it with physical fences.
The boundaries of an exclusion zone works the same way as the virtual fence boundaries: with sound and shock signals.
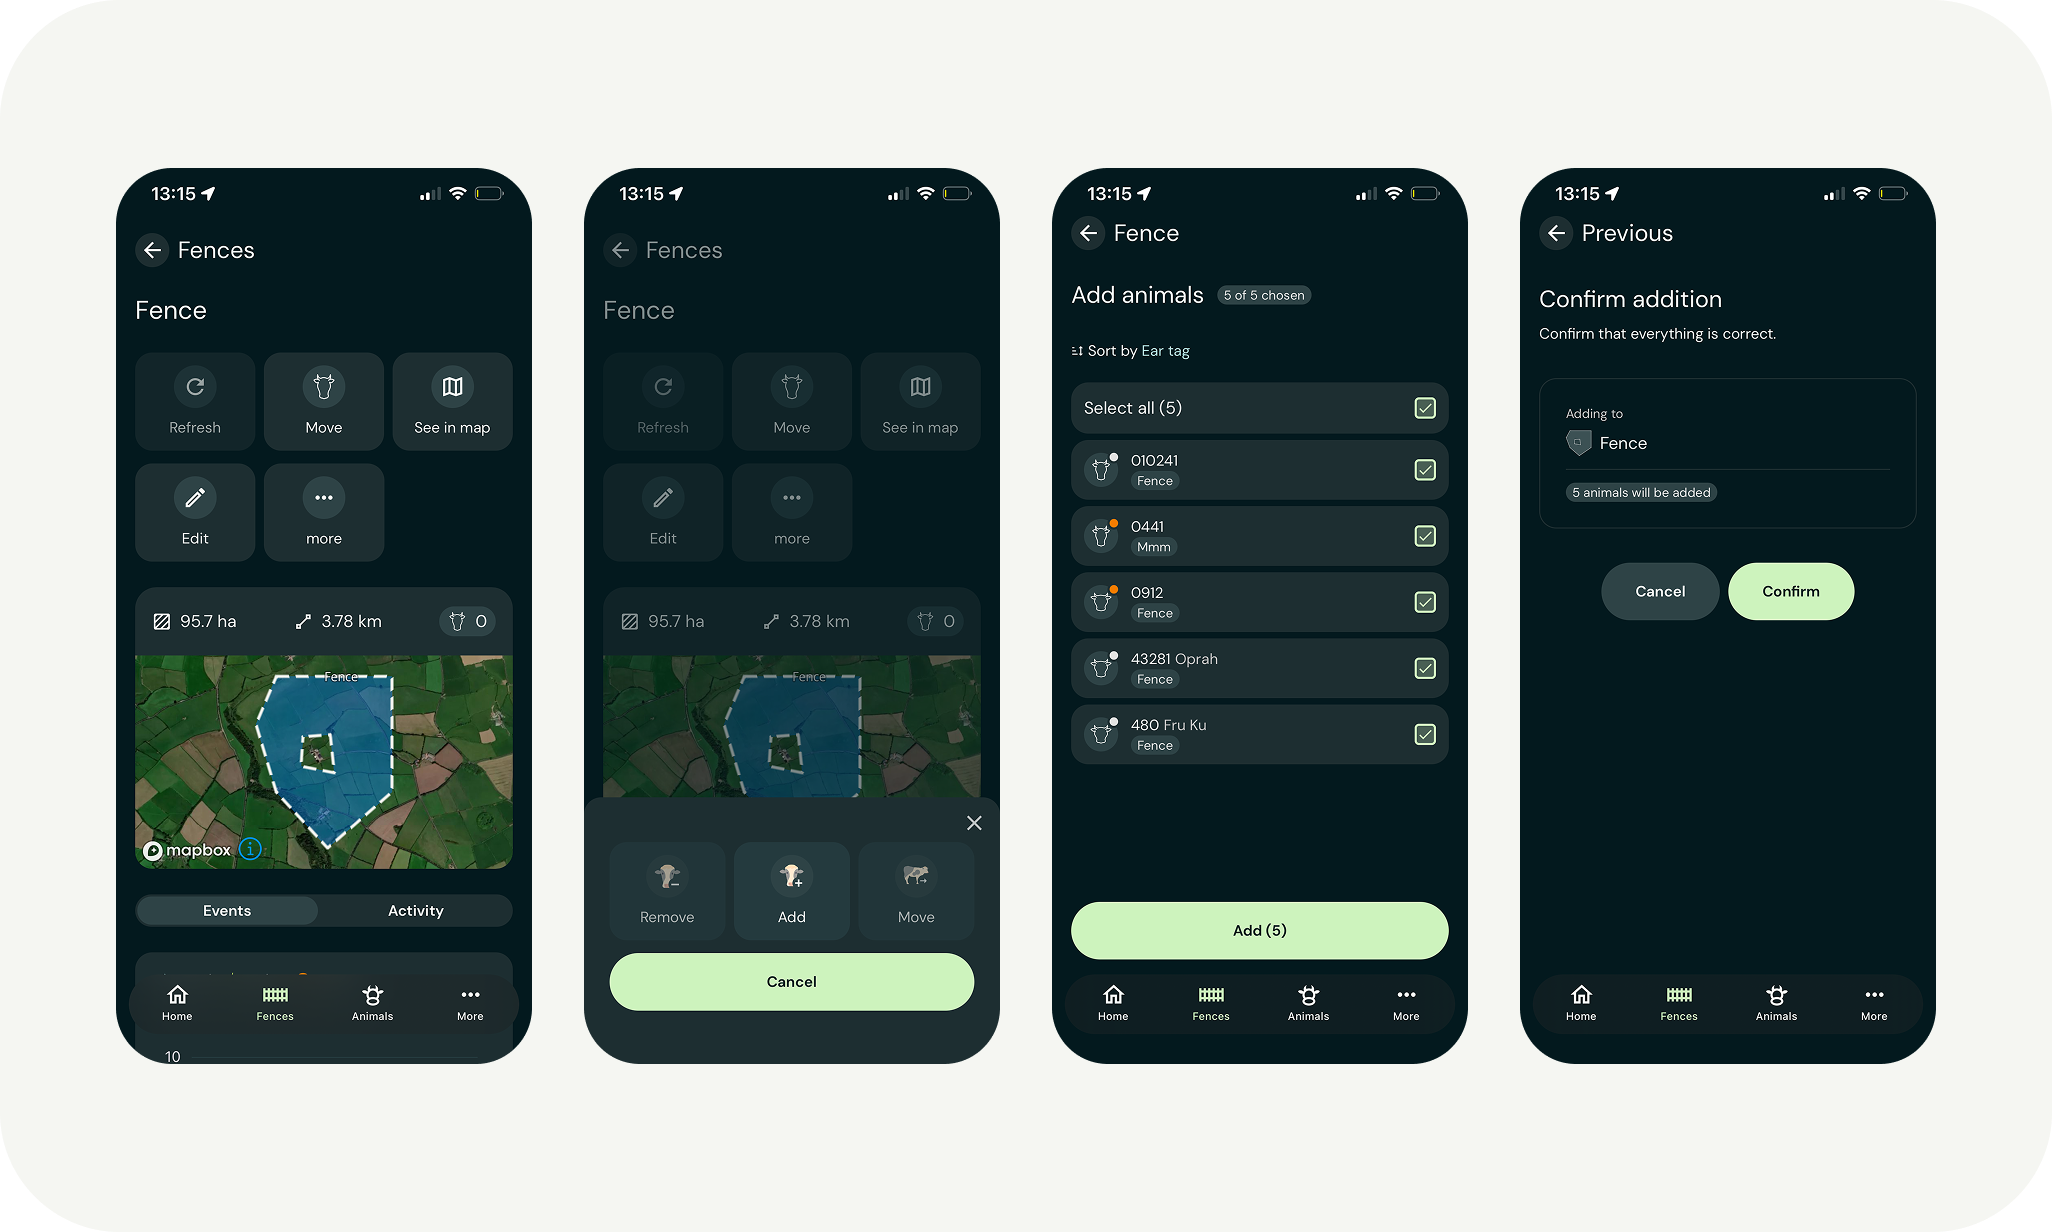
4. Add animals to the fence in the App
Inside a fence, tap “Move” and then “Add” from the menu. Select the animals you want to add to the fence from the list. It may take some time before the collars register that they have been added to the fence.
5. Physically move the animals to the fence
Bring the animals, with the collars mounted, to the new fence. The collars won’t emit sound signals and shocks when entering a fence. Once the animals are inside the fence, it becomes active.